
Oracle Integration Cloud (OIC) can easily integrate Oracle cloud applications with on-premises applications. Integrating with on-premises applications only requires the installation of an Oracle Integration connectivity agent.
Prerequisites
The connectivity agent will require a server or virtual machine. A dedicated machine is a good idea for the production agent. Supported operating systems are Linux and Windows.
For this particular example, I used Oracle Linux. The server has 2 vCPUs and 12 GB memory. A mount point 100 GB in size is more than adequate.
OIC Agent Installation.
The procedures demonstrated here are from the Oracle Integration documentation. I’m hoping that the addition of the screenshots will help clear any confusion from the original documentation.
Note: Screenshots may have information obfuscated.
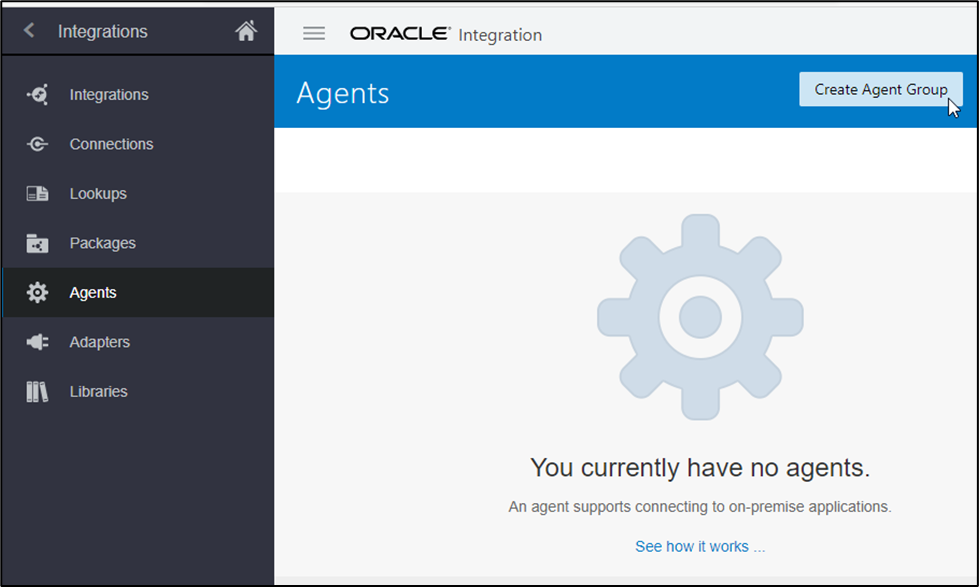
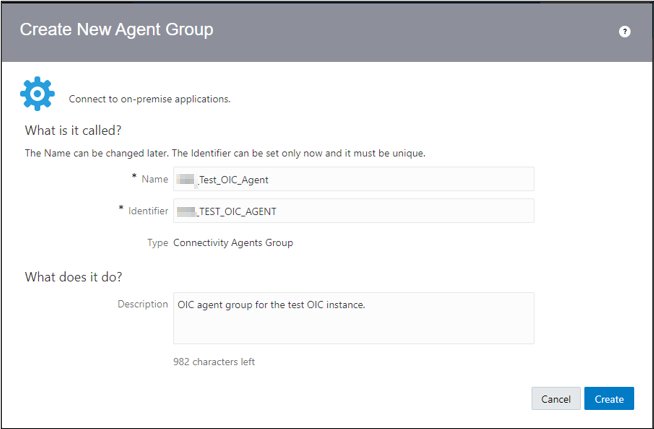
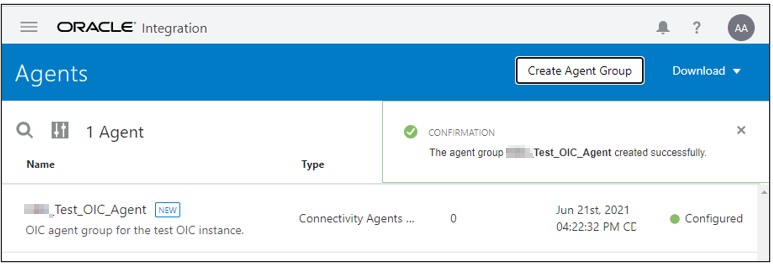
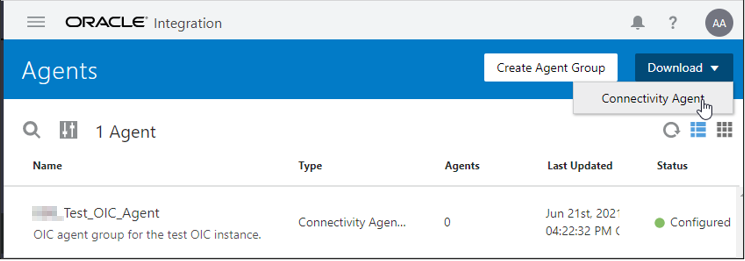
Create Agent Group in OIC
Login to the Oracle Integration Cloud.
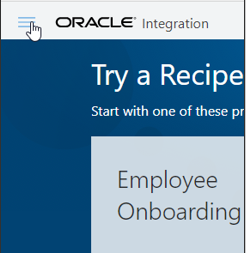
From the main dashboard, click on the left side hamburger menu.
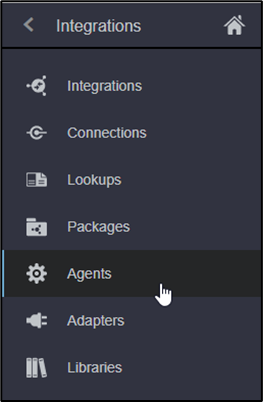
Click on Integrations

Click on Agents
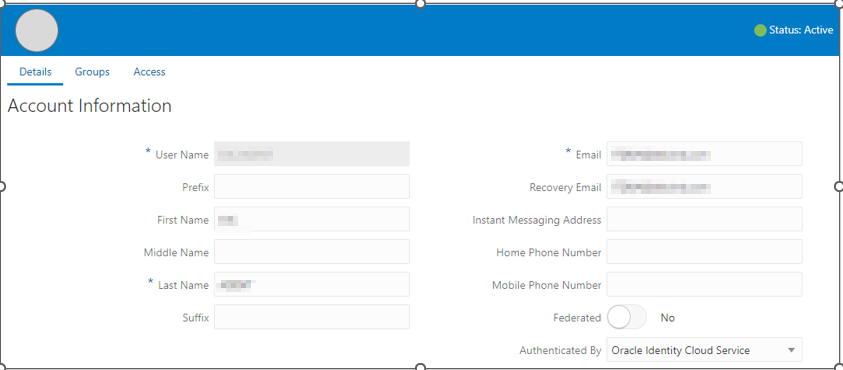
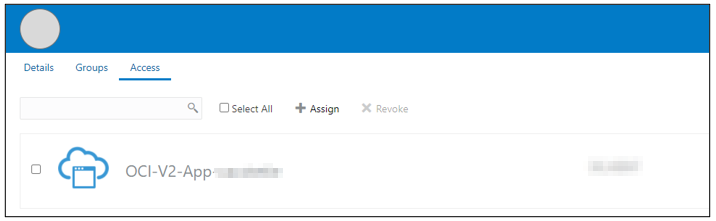
Create OIC Agent Account (used by on-premises agent to login)
Navigate to the main dashboard > Users


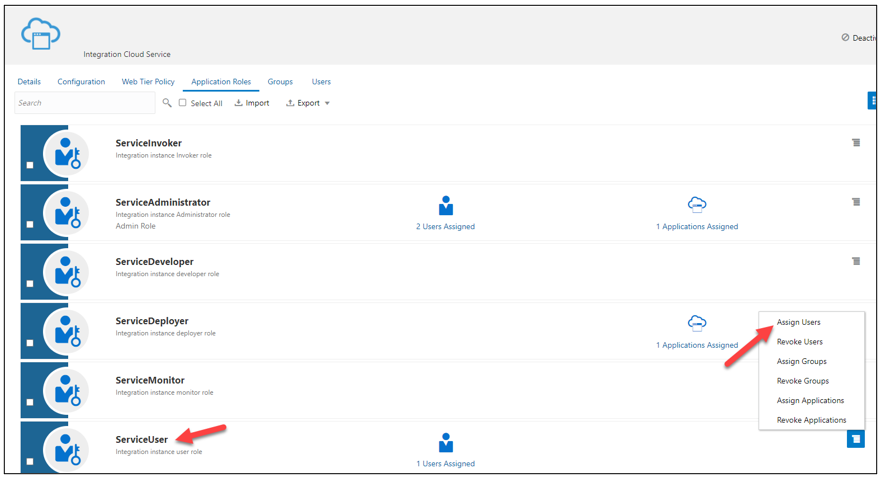
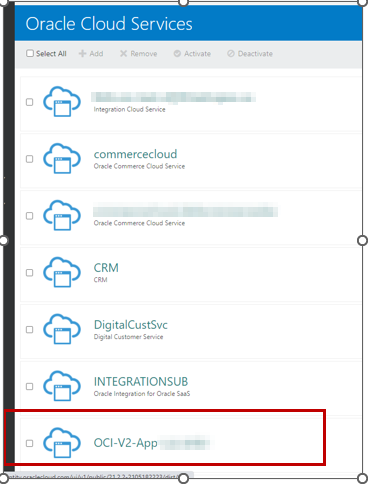
Also, the OCI-V2-App-<your tenant name> cloud service needs to be granted.
On-Premises Agent Installer
In this example, this is a new VM build with Linux 7.9 . Only the OIC agent will be installed on this VM. I’m using the oracle user and dba group for the installation. This is the same that you would find with other Oracle software installations.
First, create a stage directory
$ mkdir -p /u01/stage
Second, download the latest JDK 8 (only version certified). Open JDK is not supported. Next, transfer the file to the server to the directory created previously, /u01/stage,
Also, transfer the OIC agent that was downloaded from OIC to the directory /u01/stage
Create directories for the OIC agent and JDK.
$ mkdir -p /u01/app/oracle/oic/test

$ mkdir -p /u01/app/oracle/jdk
Copy the files to the new directories.
$ cp  jdk-8u291-linux-x64.tar.gz /u01/app/oracle/jdk

$ cp oic_conn_agent_installer.zip /u01/app/oracle/oic/test
Extract the JDK from the archive file.
$ tar -xf jdk-8u291-linux-x64.tar.gz
Set the JAVA_HOME property to the location of the JDK installation
JAVA_HOME=/u01/app/oracle/jdk/jdk1.8.0_291
Set the path with the Java location
PATH=$JAVA_HOME/bin:$PATH:$HOME/.local/bin:$HOME/bin
Update .bash_profile to include JAVA_HOME and the updated path.
export JAVA_HOME=/u01/app/oracle/jdk/jdk1.8.0_291

PATH=$JAVA_HOME/bin:$PATH:$HOME/.local/bin:$HOME/bin
Navigate to the OIC directory and unzip the file.
$ cd /u01/app/oracle/oic/test

$ unzip oic_conn_agent_installer.zip
Located InstallerProfile.cfg in the directory /u01/app/oracle/oic/test. Here is an example of the file:
# Required Parameters
# oic_URL format should be https://hostname:sslPort
oic_URL=https://<your-OIC-host>-ia.integration.ocp.oraclecloud.com:443
agent_GROUP_IDENTIFIER=TEST_OIC_AGENT

#Optional Parameters
oic_USER=<YOUR-OIC-USER>
oic_PASSWORD=*****

#Proxy Parameters
proxy_HOST=
proxy_PORT=
proxy_USER=
proxy_PASSWORD=
proxy_NON_PROXY_HOSTS=
NOTE: If you are adding a new agent, make sure the oic_URL is correct
Start the Agent
Run the connectivity agent installer as a background process.
$ cd /u01/app/oracle/oic/test

$ nohup java -jar connectivityagent.jar &
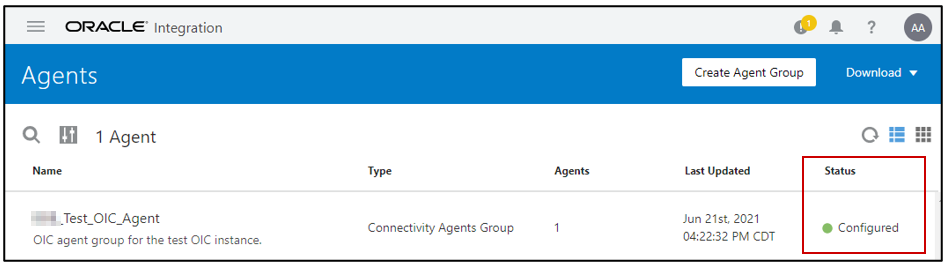
Check the Agent Status In OIC
Finally, log back in to OIC to check the agent status.
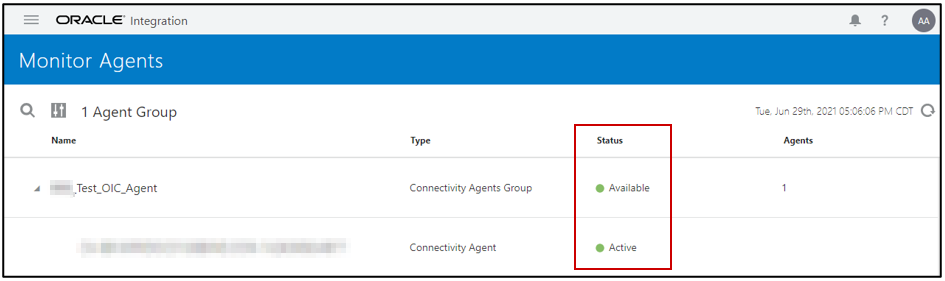
From the Monitoring page you can also see the status of the Agent.
Summary
The installation and configuration of the OIC connectivity agent is easy. Once installed, you can use different OIC connections to integrate to your on-premises applications. Some of examples of these would be REST, SOAP, and even direct database connections.


Pingback: Oracle Integration Cloud - Agent Start/Stop - Hey Alfredo...